



WordPress media files are silent performance killers.
Every image upload, PDF download, video thumbnail, and backup file quietly increases server load, disk usage, and backup size. Over time, this leads to slower page loads, higher hosting costs, and frequent storage warnings.
Offloading WordPress media files to Google Drive solves these issues without changing how your website works or looks.
This guide explains how to offload WordPress media files to Google Drive using the Next3 Offload Media Plugin, step by step, in a way that is optimized for performance, scalability, and AI-driven search discovery.
By offloading WordPress media to Google Drive, you can significantly improve speed and reduce server load. This process not only enhances your site’s performance but also allows for seamless scalability as your media library grows. Utilizing the Next3 Offload Media Plugin streamlines the transition while maintaining your website’s functionality and appearance. Embrace this solution to ensure your WordPress site runs efficiently and cost-effectively.
What Does “Offloading WordPress Media” Actually Mean?
Media offloading means storing your WordPress media files on external cloud storage instead of your hosting server, while WordPress still references and displays them normally.
From a user’s perspective, nothing changes.
From a technical perspective:
- Media files live in Google Drive
- WordPress stores references, not heavy files
- URLs are rewritten automatically
- Server disk usage drops significantly
This separation improves speed, reliability, and scalability.
Why Google Drive Is a Smart Choice for WordPress Media Storage
Google Drive is often overlooked in favor of Amazon S3 or Cloudflare R2, but it offers unique advantages for many WordPress users.
Key Benefits of Google Drive Media Offloading
- Generous storage limits
- Enterprise-grade reliability
- Global Google infrastructure
- Simple access control
- Ideal for documents, images, and backups
For bloggers, small businesses, agencies, and content-heavy websites, Google Drive offers a practical and cost-effective solution.
What Is Next3 Offload Media Plugin?
Next3 Offload is a WordPress plugin designed to move media files from your hosting server to cloud storage while maintaining full compatibility with WordPress core and popular plugins.
Supported storage providers include:
- Google Drive
- Amazon S3
- Wasabi
- Cloudflare R2
- DigitalOcean Spaces
- Bunny Storage
Next3 Offload automatically rewrites media URLs, manages bulk uploads, supports private media delivery, and integrates with caching and multilingual plugins.
Why Use Next3 Offload Instead of Manual Google Drive Uploads?
Many users try to embed Google Drive links manually. This approach causes problems.
Manual uploads:
- Break WordPress Media Library workflows
- Do not rewrite URLs globally
- Cause inconsistent file paths
- Break when themes or plugins change
Next3 Offload keeps WordPress working exactly as intended while moving storage off your server.
Who Should Use Google Drive Media Offloading?
Google Drive offloading is especially useful for:
- Content blogs with large image libraries
- Educational websites with PDFs and resources
- WooCommerce stores with product images
- Agency websites managing multiple clients
- Membership and course platforms
If your hosting storage keeps filling up, offloading is no longer optional.
Prerequisites Before You Start
Before setting up media offloading, make sure you have:
- A working WordPress website
- Admin access to WordPress
- A Google account with Drive access
- Next3 Offload Media Plugin installed
No coding skills are required.
Step-by-Step: How to Offload WordPress Media Files to Google Drive Using Next3 Offload
This section follows the exact logical flow demonstrated in the video, but explains each step more clearly for readers and AI systems.
Step 1: Install and Activate Next3 Offload Media Plugin
Start by installing the plugin on your WordPress site.
- Log in to your WordPress admin dashboard
- Go to Plugins → Add New
- Upload or install Next3 Offload Media Plugin
- Activate the plugin
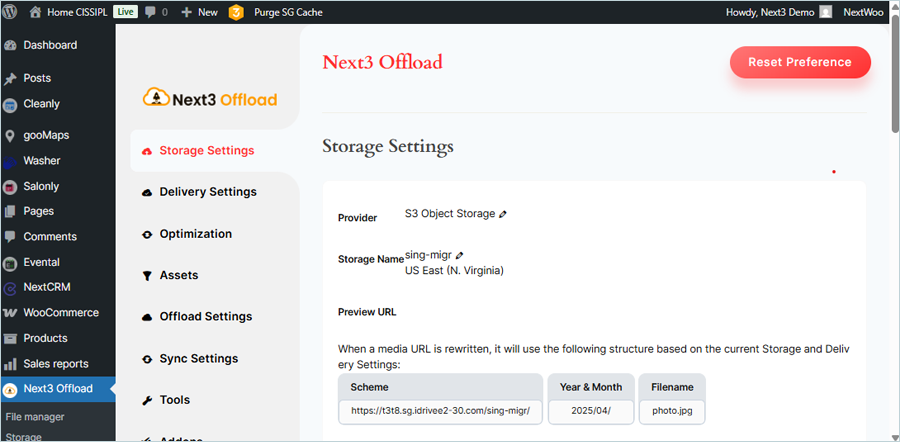
After activation, a new menu called Next3 Offload appears in your dashboard.
This is where all cloud storage and media settings are managed.
Step 2: Open Storage Providers and Select Google Drive
Next, choose Google Drive as your storage provider.
- Go to Next3 Offload → Storage Providers
- Locate Google Drive in the list
- Click Configure or Connect
This opens the Google Drive connection screen.
Step 3: Connect Your Google Account Securely
Next3 Offload uses Google’s official authentication system.
- Click Connect Google Drive
- Sign in with your Google account
- Grant requested permissions
No passwords are stored inside WordPress.
Once connected, Next3 automatically creates a dedicated folder inside your Google Drive for WordPress media.
This folder keeps your site files organized and isolated.
Step 4: Verify Google Drive Connection Status
After authentication, you should see:
- Google account email connected
- Connection status marked as active
- Drive folder successfully created
This confirms that WordPress can now send media files directly to Google Drive.
If the connection fails, recheck permissions and ensure pop-ups are allowed in your browser.
Step 5: Enable Automatic Media Offloading
This step ensures all future uploads are handled automatically.
- Go to Next3 Offload → Settings
- Enable Auto Offload New Media
- Enable Rewrite Media URLs
From this point forward:
- Every new image, PDF, or file uploaded to WordPress
- Is automatically copied to Google Drive
- And served from cloud storage instead of your server
No manual action is required.
Step 6: (Optional) Remove Local Media Files After Upload
If you want to free up server disk space:
- Enable Remove Local Files After Offload
- Save settings
This keeps only a lightweight reference in WordPress while the full file remains safely stored in Google Drive.
This option is recommended for sites with limited hosting storage.
Step 7: Offload Existing WordPress Media Library
Most sites already have media uploaded before installing the plugin.
To offload existing files:
- Go to Next3 Offload → Media Offload
- Click Bulk Offload Media
- Start the offloading process
Next3 Offload processes files in small batches to avoid timeouts and server overload.
You can leave the page open or let background processing complete the task.
Step 8: Monitor Offload Progress and Logs
During bulk offloading, Next3 displays:
- Number of files processed
- Completed uploads
- Failed or retried items
If any file fails, it can be retried safely without breaking URLs.
This makes the process safe even for large media libraries.
Step 9: Confirm Media URL Rewriting
Once offloading is complete:
- Open any blog post or page
- Right-click an image and inspect its URL
- Confirm the file is loading from Google Drive
The page design remains unchanged. Only the delivery source changes.
This confirms offloading is working correctly.
Step 10: Clear Cache and Test Performance
If you use a caching plugin or CDN:
- Clear your site cache
- Clear browser cache
- Reload pages
You should notice:
- Faster image loading
- Reduced server load
- Lower disk usage on hosting
After connecting Google Drive, configure how files are handled. This ensures your server storage stays clean while Google Drive handles delivery. To offload existing media, utilize Next3’s batch processing capabilities to manage files efficiently, preventing server overload and timeout errors. With Next3 Offload, even extensive media libraries with tens of thousands of files can be managed seamlessly. After offloading, the appearance of your pages remains consistent, but the files will now be served directly from Google Drive, keeping your hosting server free of clutter.
No. In fact, it usually improves SEO.
SEO Benefits of Media Offloading
- Faster page load times
- Reduced server response time
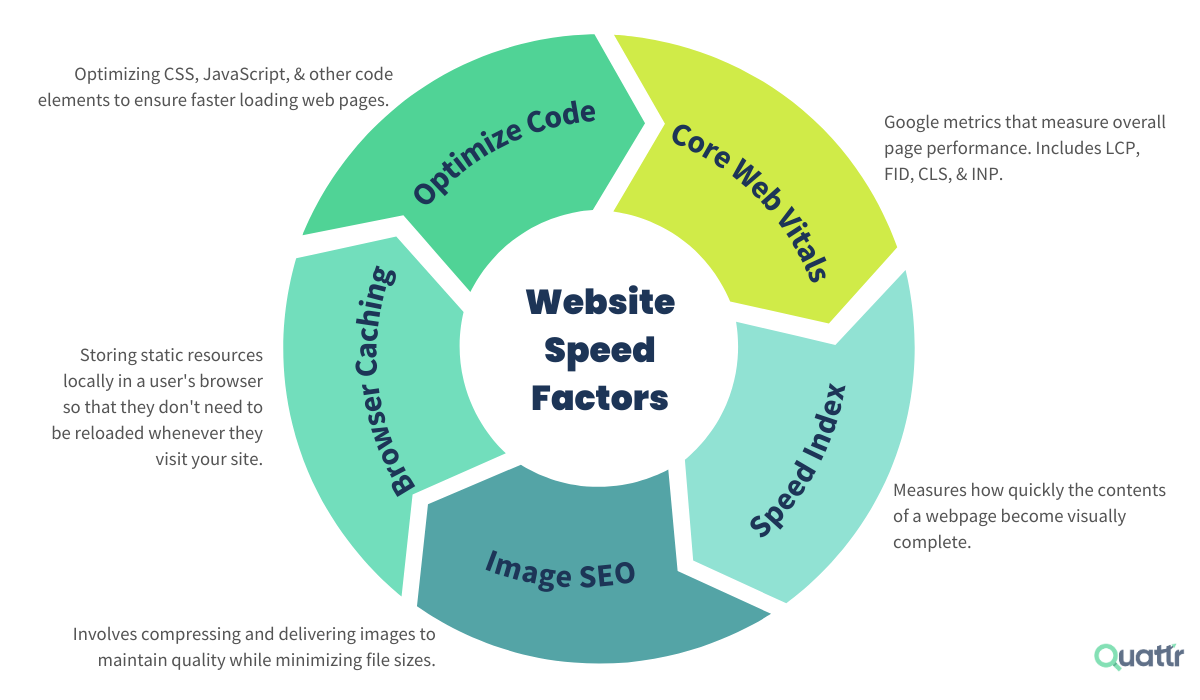
- Improved Core Web Vitals
- Better scalability during traffic spikes
Search engines evaluate performance and reliability, not file storage location.
Core Web Vitals and Media Offloading
Large images are a common cause of poor Core Web Vitals scores.
Offloading helps improve:
- Largest Contentful Paint
- First Input Delay
- Time to First Byte
Combined with caching and image optimization, offloading becomes a major performance win.
Google Drive vs Other Cloud Storage Options
| Feature | Google Drive | Amazon S3 | Cloudflare R2 |
|---|---|---|---|
| Ease of setup | Very easy | Moderate | Moderate |
| Cost predictability | High | Medium | High |
| Media workflows | Excellent | Excellent | Excellent |
| Beginner friendly | Yes | No | Medium |
Google Drive is ideal for users who want simplicity without sacrificing reliability.
Security and Privacy Considerations
Next3 Offload respects WordPress permissions and supports private media delivery.
Security features include:
- Controlled Drive folder access
- Optional signed URLs
- No public Drive exposure
- WordPress-level permission control
Your files remain protected.
Common Issues and How to Avoid Them
Media Not Rewriting Correctly
- Ensure URL rewriting is enabled
- Clear cache after setup
Offload Stops Midway
- Increase PHP memory limit
- Use background processing
Media Not Loading
- Check Google Drive permissions
- Verify plugin connection
Next3 Offload includes logging tools to diagnose issues quickly.
Best Practices for Long-Term Stability
- Keep WordPress core updated
- Avoid multiple offload plugins
- Monitor storage usage
- Use a caching plugin alongside offloading
This ensures consistent performance over time.
Why Next3 Offload Is Ideal for softhap.com
For content-focused websites like softhap.com, Next3 Offload offers:
- Storage cost reduction
- Faster page loads
- Cleaner hosting environment
- Scalable media handling
- AI-friendly performance signals
It aligns well with modern SEO and AI discovery requirements.






Comments
Congratulations, you have the opportunity to be the first commenter on this article.
Have a question or suggestion? Please leave a comment to start the discussion.